Balancing Rack Weight on Rough Connectors
Rough connectors reveal packing mistakes quickly. This guide shows how to place rack weight low and evenly, what to keep on your body, and how a short morning checklist keeps the bike predictable when the surface turns broken under the tire.
Why rack balance shows up first on rough connectors
Smooth asphalt forgives packing mistakes. Broken connectors do not. When the surface turns into washboard, patchy gravel, or cracked farm lane edges, a high or uneven load starts steering the bike for you. The handlebars feel busier, the front wheel wanders in ruts, and every correction costs energy you planned to spend on covering ground.
Balance is less about owning specialized bags and more about where mass sits relative to the frame. Weight carried low and close to the bike usually keeps the machine predictable. Weight stacked high, hanging wide, or split unevenly between sides makes small surface hits feel larger than they should.
What belongs on the rack and what stays on you
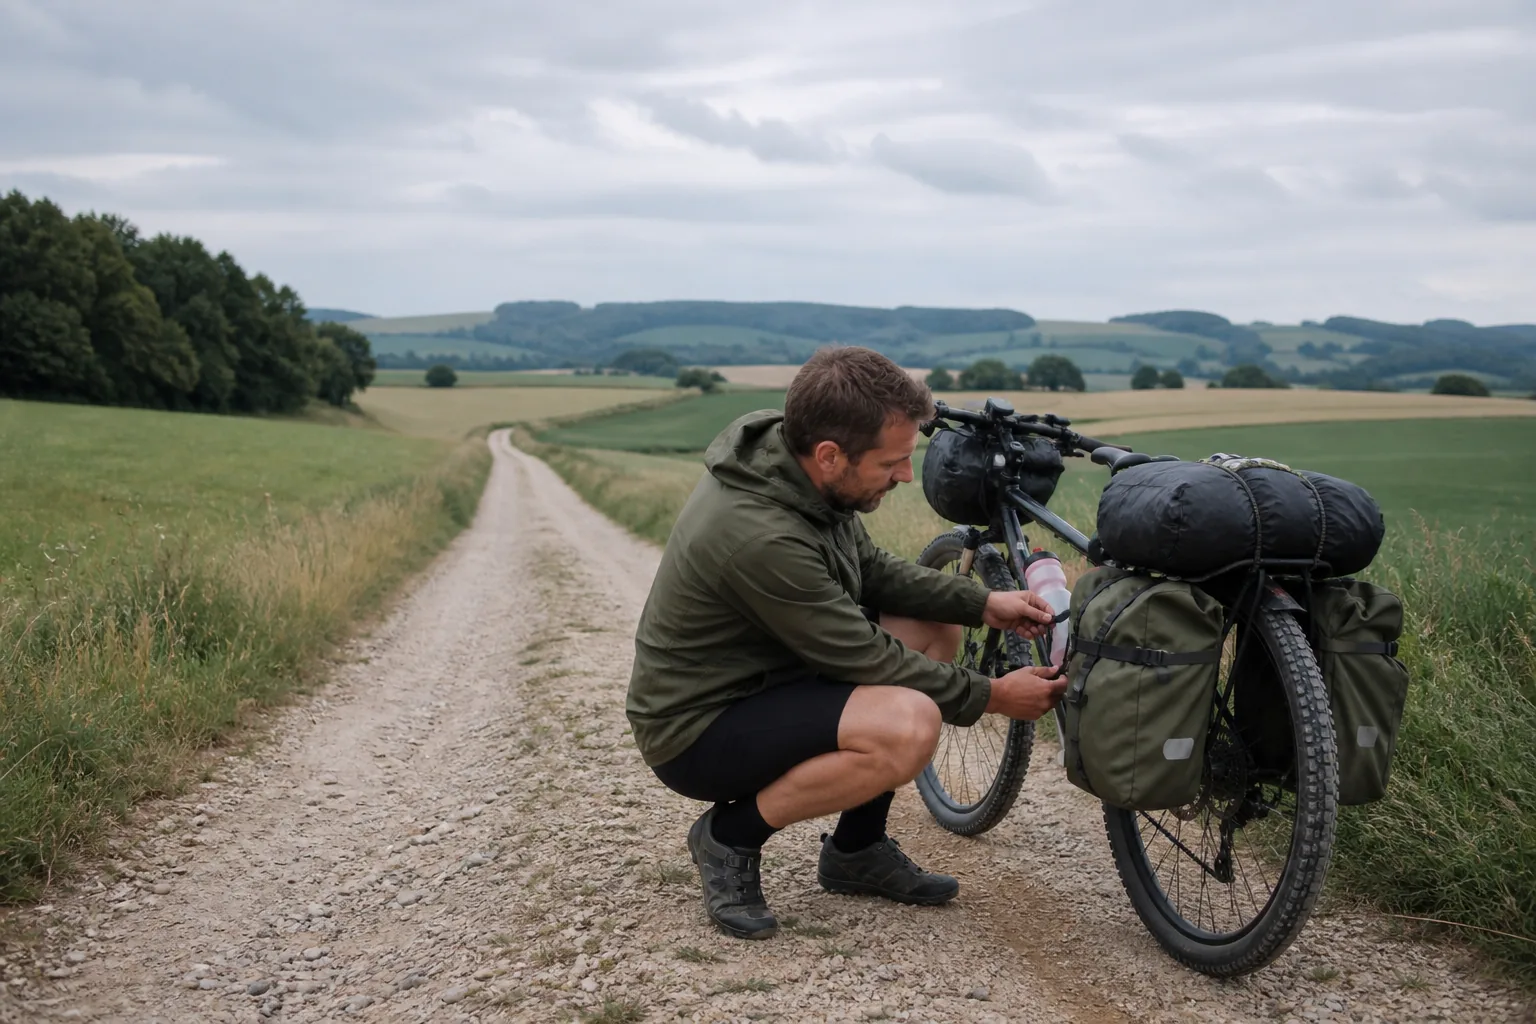
Put dense, stable items low on the rack: tools, spare tube kit, and food that will not shift. Soft volume can ride higher if it stays compressed. Keep frequently needed layers where you can reach them without unpacking the whole side. Items that change the bike's manners when they move — liquids, loose hardware, bulky cook sets — need firm placement and no empty rattle space left over.
Your body can carry a small, stable share: a light pack with water, a rain shell, and snacks. That share should remain light enough that it does not fight the bike in crosswinds or on steep pitches. If the pack starts to bounce, reduce it. Bounce is a balance problem wearing another name.
If a bag moves when you lift the rear of the bike a few centimeters, it will move more when the road starts shaking. Tighten, lower, or remove it before you roll out.
A morning checklist before rough miles
- Load both sides to a similar feel, then confirm with a short curb bounce test.
- Drop heavy items as low as the rack design allows and center them over the axle line.
- Compress soft gear so nothing can migrate upward during the first hour.
- Check that straps clear the tire, brake, and heel path through a full pedal stroke.
- Ride two quiet minutes and listen for shift, slap, or uneven pull on one side.
This checklist is short on purpose. The aim is to catch the problems that appear only after the bike is fully loaded, not to rebuild your packing system every morning.
How weight changes steering and climbing
On descents and loose corners, a rear-heavy high load can make the front feel light and vague. On climbs, the same load can keep the front planted but ask more from your pacing because every weave costs extra. Side imbalance shows up as a constant micro correction, especially in ruts that want to catch one wheel and then release the other.
- Lower the densest items before you add more soft volume up high.
- Avoid hanging awkward shapes far outside the rack footprint.
- Keep repair tools reachable without emptying food or lodging gear first.
- Re-check balance after buying water or food mid-stage, when mass changes quickly.
When to leave something behind
If a connector looks rough and your test ride already feels nervous, remove comfort extras before you remove safety basics. A calmer bike protects the day better than an extra clothing option you will not use. Touring packing is a sequence of tradeoffs, and rough surfaces make those tradeoffs visible early in the stage.
Treat the first rough kilometer as feedback, not as a verdict on your fitness. Stop, adjust, and continue only when the bike tracks in a straight line with less argument. That small pause often saves a longer fight with fatigue later, when hands are tired and concentration is already thinner.
Over a full stage, good balance feels quiet. You notice the road, not the luggage. If you keep noticing the luggage, the load still has an unfinished job — and finishing that job on the roadside is part of riding well, not a sign you packed badly for good.
Field notes from rough connectors
After a few rough connectors, patterns appear. Bags that seemed secure on pavement can creep outward when the rack flexes. Soft dry bags can settle into a higher, rounder shape that catches wind. A bottle sleeve that looked tidy can bounce enough to slap the frame and distract you in a technical rut.
Carry a short roadside reset routine. Stop in a safe pull-off, reopen the densest bag, reseat heavy items low, and re-cinch compression straps from the bottom up. Then walk the bike a few meters and watch whether either side droops. If one side still looks heavier, swap one dense item across rather than adding more tension to a failing arrangement.
End the day with a two-minute unpack note: what migrated, what stayed quiet, and what you will place differently tomorrow. Those notes compound. Within a short multi-day stretch, packing stops being guesswork and becomes a stable setup you can trust when the surface gets ugly again.
Matching pack choices to surface risk
Not every stage needs the same packing strictness. On long smooth connectors you can tolerate a slightly higher soft load if straps stay firm. On rough connectors, lower the standard. Reduce side-to-side width, keep dense items centered, and accept that some comfort gear waits for better pavement later in the day.
Think in surface risk, not in gear identity. A cook set is not automatically a problem; a cook set that sits high and rattles is. Extra clothing is not automatically excess; a loosely packed clothing bag that climbs upward through vibration is. Judge each item by how it behaves when the bike shakes, then place or remove it accordingly.
Before a known rough segment, do one intentional reset even if the morning checklist already passed. Surfaces change the meaning of secure. A two-minute reset at the segment start is cheaper than fighting the handlebars for an hour while the load slowly argues with every rut.
When the segment ends, notice what stayed quiet. Those placements become your default for the next rough corridor. Over time the bike starts to feel like a stable platform again, and packing becomes a practiced setup rather than a daily improvisation under pressure.
If you travel with a partner, agree on a shared language for balance problems: lean, slap, wander, or pull. Clear words make roadside fixes faster and keep small handling issues from turning into a long argument with the bike and each other.